

 Savanna Fiegl
1 min read
A weed whacker, also known as a string trimmer or weed eater, is an invaluable tool for keeping your lawn and garden looking neat and well-groomed. However, like any piece of equipment, it requires regular maintenance to  ensure optimal performance and longevity. Neglecting maintenance can lead to reduced efficiency, frustrating breakdowns, and ultimately, the need for costly repairs or replacement. In this guide, we'll walk you through the essential steps to keep your weed whacker in prime condition.
1. Pre-Use Inspection:
Before firing up your weed whacker, take a moment to inspect it thoroughly. Check for any visible signs of damage, such as cracks in the housing or fraying of the trimmer line. Ensure that all fasteners, including nuts, bolts, and screws, are tightened securely. Pay particular attention to the cutting head and guard, as these components are crucial for safe and effective operation.
2. Clean the Air Filter:
The air filter plays a vital role in preventing dirt, dust, and debris from entering the engine and causing damage. Over time, the air filter can become clogged with these contaminants, restricting airflow and hindering engine performance. Regularly remove and clean the air filter according to the manufacturer's instructions. If the filter is excessively dirty or damaged, replace it with a new one to ensure optimal engine function.
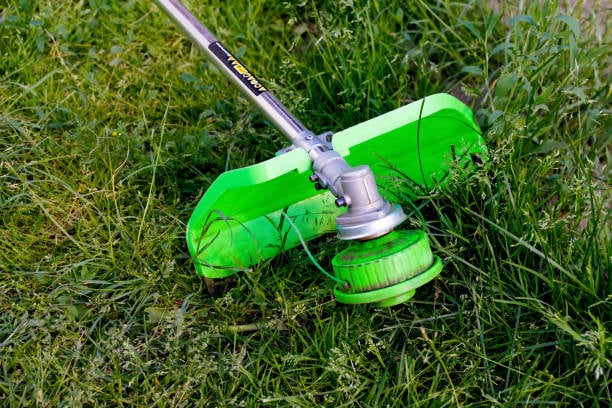
3. Maintain the Trimmer Line:
The trimmer line is the cutting mechanism of your weed whacker and requires regular attention to maintain its effectiveness. Inspect the trimmer line before each use, looking for signs of wear, fraying, or breakage. If the line is worn or damaged, replace it with a new one to ensure clean and precise cutting. Additionally, periodically check the trimmer head for any debris buildup and clean it thoroughly to prevent clogs and jams.
5. Restringing Your Whacker
Restringing a weed whacker is a straightforward task that can significantly improve the efficiency and cutting performance of the tool. To begin, ensure the weed whacker is turned off and disconnected from any power source. Remove the spool housing from the trimmer head and carefully unwind any remaining trimmer line. Next, select the appropriate gauge and type of trimmer line for your weed whacker, typically indicated in the user manual. Measure and cut the length of the trimmer line according to the manufacturer's  recommendations. Insert one end of the trimmer line into the anchor hole on the spool and wind it evenly in the direction indicated by the arrows on the spool. Leave a small length of line protruding from the anchor hole and reassemble the spool housing onto the trimmer head. Finally, feed the trimmer line through the cutting head's eyelets or guides and secure any loose ends. With the trimmer line properly installed, your weed whacker is ready to tackle overgrown grass and weeds with ease.
4. Check and Adjust the Carburetor:
The carburetor is responsible for mixing air and fuel in the correct ratio for combustion in the engine. Over time, the carburetor may become dirty or misadjusted, leading to poor engine performance and starting difficulties. Periodically inspect the carburetor and adjust it according to the manufacturer's specifications. Cleaning the carburetor with a carburetor cleaner can also help remove any built-up debris and ensure smooth operation.
5. Lubricate Moving Parts:
Proper lubrication is essential for reducing friction and preventing premature wear on moving parts such as the drive shaft and trimmer head. Apply a few drops of lubricating oil to these components regularly to keep them operating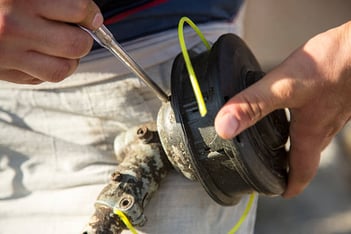 smoothly. Be sure to use a lubricant that is compatible with your weed whacker's materials and designed for outdoor power equipment.
6. Store Properly:
Proper storage is key to maintaining your weed whacker's performance and extending its lifespan. After each use, clean the weed whacker thoroughly to remove grass clippings, dirt, and debris. Store the weed whacker in a dry, well-ventilated area away from moisture and extreme temperatures. Consider using a protective cover to shield the equipment from dust and debris when not in use.
By following these maintenance tips, you can keep your weed whacker running smoothly and efficiently for years to come. Regular upkeep not only ensures reliable performance but also saves you time and money on repairs and replacements. With a little care and attention, your weed whacker will continue to be a valuable tool in your lawn care arsenal.

1 min read
Maintaining a lush, healthy lawn can be a rewarding experience, but it also comes with its fair share of challenges. From battling weeds to ensuring...

1 min read
You’re standing at the sink, rinsing your coffee mug, when you see it—one tiny ant scurrying across the counter. Then another. And another. Suddenly,...